The Lightbits storage cluster uses replication for data availability and durability. For longer-term durability, remote backup can be used.
A Lightbits cluster running over Azure optionally backs up the data of a cluster to an Azure Blob. This provides yet another layer of protection for the data. If the entire cluster fails and all data is lost - or if there is a need to shut down the cluster - the backed-up data still remains stored in the Azure Blob.
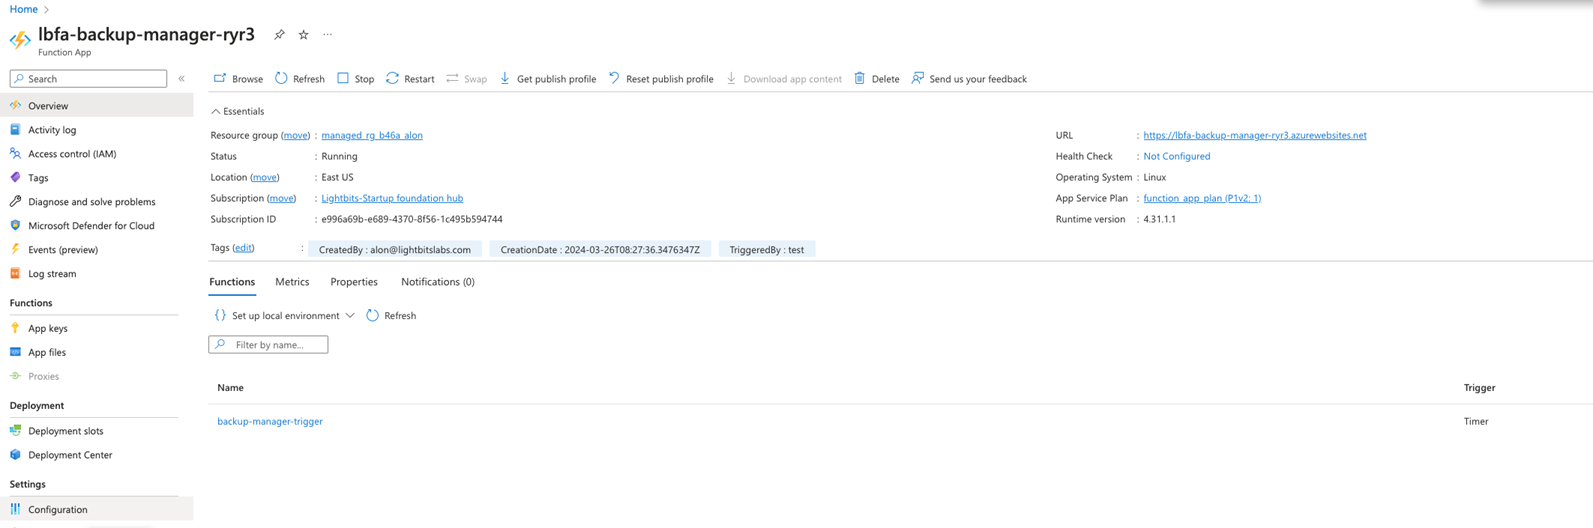
The backup-restore functionality is implemented using logic run by a time trigger. This timed-trigger mechanism runs on a serverless function (Function App), which is deployed within the Lightbits cluster in Azure.
The Function App (FA) checks every one minute for tasks to be done (backup or restore). When a task is found, the FA will execute all the required actions for that task until completion.
A backup task exports data from the cluster to a backup location, while a restore task imports the data from the backup location to the cluster. Exporting and importing the data is done by the backup exporters. The backup exporters are Azure VM instances that execute the backup and restore processes. They are created when a backup cycle is initiated, and are terminated when all volumes have been backed up and the backup cycle is done.
Backup
The following underlines the backup process steps implemented by the FA:
- At the time of backup, the FA will take a snapshot of all volumes in the cluster.
- The FA will start up the exporter instances.
- The FA will then create a clone based on each of the snapshots taken, and send the backup jobs to the exporters.
- If this is the first backup of the volume, the exporter process will copy the data from the snapshot to Blob storage (full backup).
- If an existing backup already exists, the exporter process will copy over only the incremental changes since the previous backup (incremental backup).
- When all volumes have been backed up, exporter instances will be terminated.
- The next backup schedule is set up.
Restore
The restore process can only be manually triggered by the user. Restore is done by creating a trigger for a specific volume. To trigger a restore process, the required parameters for the trigger should be updated in the restore-commands file, which is located at the container backup-manager-container inside the managed app storage account.
The following underlines the restore process steps implemented by the FA:
- The FA identifies the trigger from the commands file and starts up an exporter instance (if there are none up at the time).
- The FA starts the restore process.
- At the end of the process, a volume in the Lightbits cluster with the name given in the configuration file will be created.
An attribute named Backup Retention is a bucket lifecycle rule that is used to delete old backups.
Enabling the Backup and Restore Feature
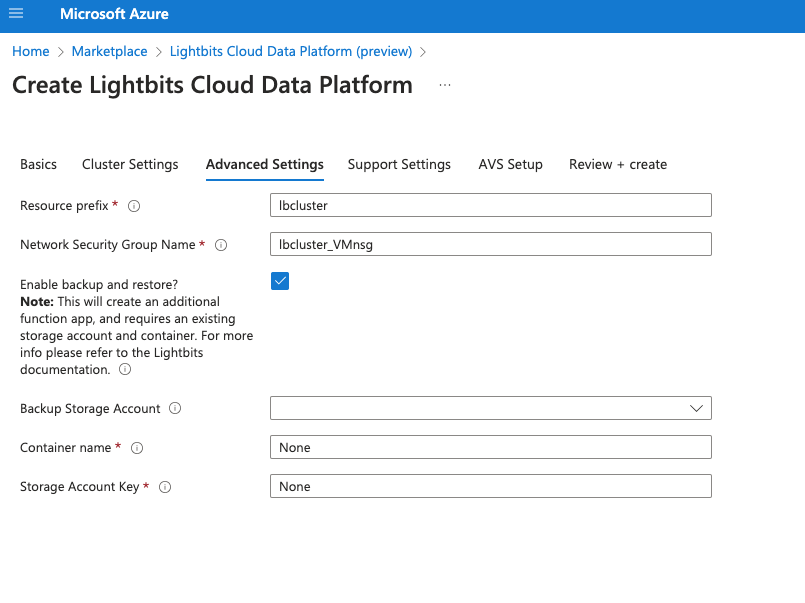
When deploying a Lightbits Cloud Data Platform solution, you can select whether to enable the backup and restore feature.
In the Advanced Settings tab, select the enable backup and restore checkbox to enable the backup and restore feature.
If you choose to enable the feature, you will need to add the following parameters:
- Backup Storage Account: The storage account in which the backups should be exported.
- Container name: The name of the specific container in the storage account to where the backups should be exported.
- Storage Account Key: A key to the selected storage account to provide read/write permissions, for the FA to export and import data from and to the storage account.
Backup Process
- Backup is performed automatically based on the defined schedule during initial setup. Scheduling is done per cluster. Therefore, when the scheduled time comes up and the backup is initiated, the backup is done on all available volumes within the cluster.
- The backup process is based on snapshots that are taken periodically according to the backup schedule. For every backup cycle, the latest and previous snapshots are compared, and only changed logical block ranges are copied to Azure Blob. For example, there could be a daily schedule at 1:00 am, at which time the backup procedure will start and take a snapshot on each of the existing available volumes. Once snapshots are taken, the backup exporter will start the backup procedure for each of the volumes. It will create a temporary clone of the snapshot and copy the data to Blob.
- This ensures that only data present on the volume during the backup scheduled time when the snapshot was taken will be backed up, and that we have time consistency for the backup. The cloned volumes are temporary and will be deleted once the backup is finished.
- The first backup of a volume will always be a full backup. From this point on, every backup of the volume will be incremental, and will copy and store only the changed block ranges. During the backup process, the exporter will run a comparison of the existing snapshot to the previous backup snapshot to identify the block ranges that were changed. Only the changed block ranges will be copied during the incremental backup.
Restore Process
- A restore process is specific to a certain backup taken at a certain time. The restore is initiated by saving the restore configuration named
restore-commandsin the Azure's containerbackup-manager-container. This is located in the managed application's storage account. Once the restore is triggered, the backup importer will create a new volume and copy all of the data from the relevant backup to the volume. - Once restore is done, you should update the ACL of the restored volume. This is in order to give access to any client (ACL=ALLOWANY_),_ or to limit access to the volume to specific clients. This should only be done after you verify in the FA log that the restore is finished. Once restore is done, the “auto restore” string in the ACL can be removed and you can configure the ACL as required. Note that once the “auto_restore” flag is removed from the ACL, it will be backed up as any other available volume in the cluster.
Triggering the Restore Process
Before triggering a restore process, the following information should be collected:
- ClusterUUID: Can be taken from the Lightbits get cluster info API.
- VolumeUUID: The UUID of the volume that is required to be restored. Note that the restore command will not affect the existing volume but instead will restore onto a new volume. If the cluster and volume exist, the Volume UUID can be found using the Lightbits get volume or list volumes API. If the cluster or volume do not exist, you will need to list all the folders under the cluster UUID backup folder. Each folder holds the UUID_volumeName.
- BackupUUID: Can be found in a Blob under the clusterUUID → VolumeUUID folder. There will be a list of folders, with each representing a different backup UUID. Each backup UUID should be from a different date. Use the backup UUID from the date that is required to restore from.
- Name: The new volume name to give to the restored volume. The restore does not “restore in place” and will not overwrite the existing volume, but instead will create a new volume with the restored data.
- Size: The size of the volume to allocate for the restore.
- ProjectName: The project that the volume should be associated with.
The format of the restore command and parameters should be as follows:
Data Retention
- The Backup Retention default time is one week (10080 minutes). This is a global parameter, affecting all backups.
- This parameter can be modified by setting the FA's RetentionTimeMin parameter.
- The retention process is governed by the backup FA, and executed by a dedicated VM instance. The instance is invoked on demand to perform the backup retention job, and terminated after the job is done.
- Each backup contains the data modification from its preceding backup. See the Backup Structure section below for additional information.
- In the retention process, the data that is no longer needed (i.e., the data that is unique to the retired backup) is deleted. All metadata objects belonging to the retired backup are deleted as well.
Backup Structure
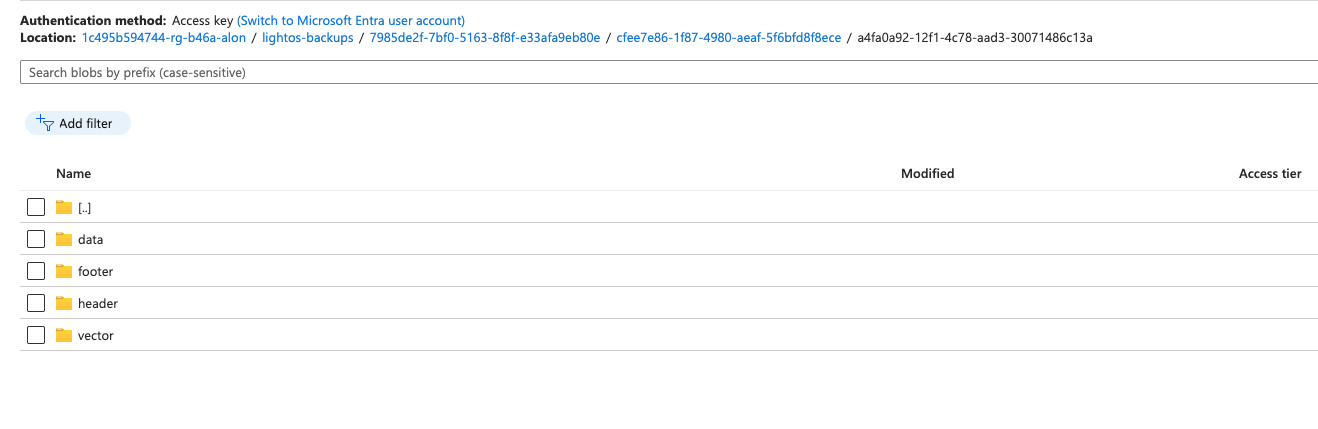
- The backup repository should be accessed with caution. Any change to backup files or structure could invalidate the backup.
- In the Azure console, go to the specific storage account and navigate to the container name given in the backup configuration.
Cluster: If you have different clusters connected to the same backup repository, you will have a different path for each cluster.
Backups_db: Contains general information about this cluster's backup status.
Volume: Each volume that is backed up has a separate folder.
Snapshot: Each backup that is taken will be in a separate folder.
Header: This folder holds a header file in json format with the following information:
- Size: size of the backup in bytes
- Start Time: when the backup started
- Snapshot UUID
- Cluster UUID
- Origin Volume Name (the name of the volume that was backed up)
- Backup UUID
- Version - for backward compatibility
- Encryption - whether the backup is encrypted or not
Footer: This folder holds a footer file in json format with the following information:
- Size: Size of the backup in bytes
- Sha256 signature for data integrity
Vector: This folder holds information about the origin of each data range (this is used for the incremental backups).
Backup Scheduling
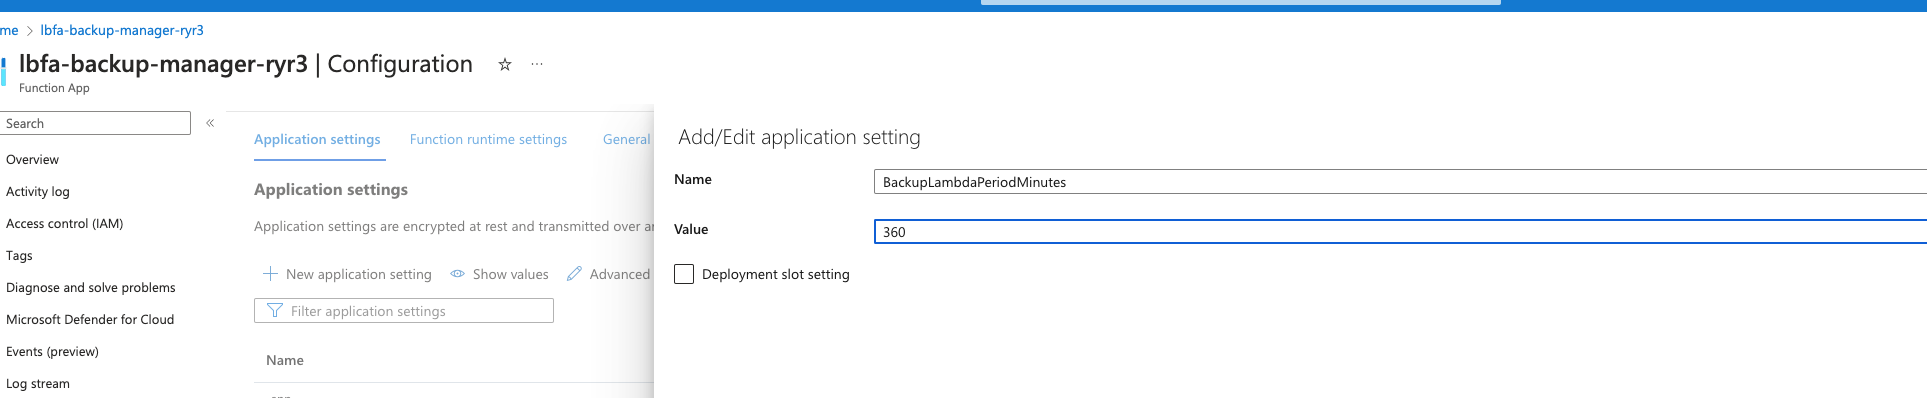
The recommended backup-schedule is no sooner than once every 6h (360 minutes). The backup schedule can be updated by adjusting the parameters of the FA. This should be done with caution as it could impact the stability of the backup/restore process.
In the Azure Managed app, go to the FA dashboard.
From the left menu, select Configuration.
In Application Settings, edit the environment variable - BackupLambdaPeriodMinutes (create it if it does not exist) - and change it to the desired time in minutes: