Deploying Lightbits for AVS
For a video tutorial, please see the section Chapter 2: Deploying the Lightbits Cluster on AVS in the AVS video series.
Users performing this action will require the permissions outlined in the Minimum Required Permissions article.
Navigate to the Marketplace Page
Access the Azure portal using the common link ms.portal.azure.com, and log in using your Azure credentials.
Once in the portal, use the search bar and search for Marketplace, and then click on the entry.
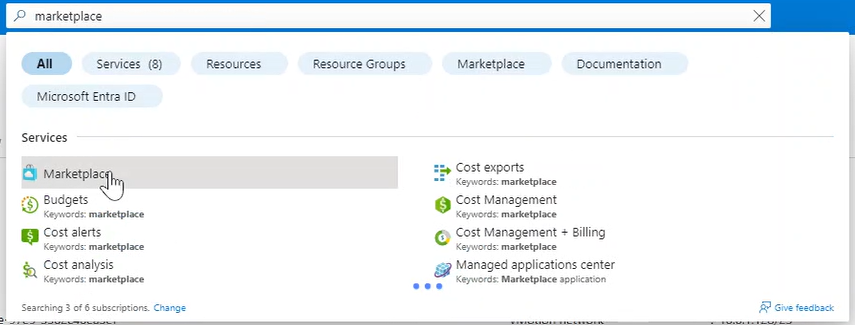
Inside the Marketplace blade, search for Lightbits and select a version higher than 3.6.1.
Basics Tab
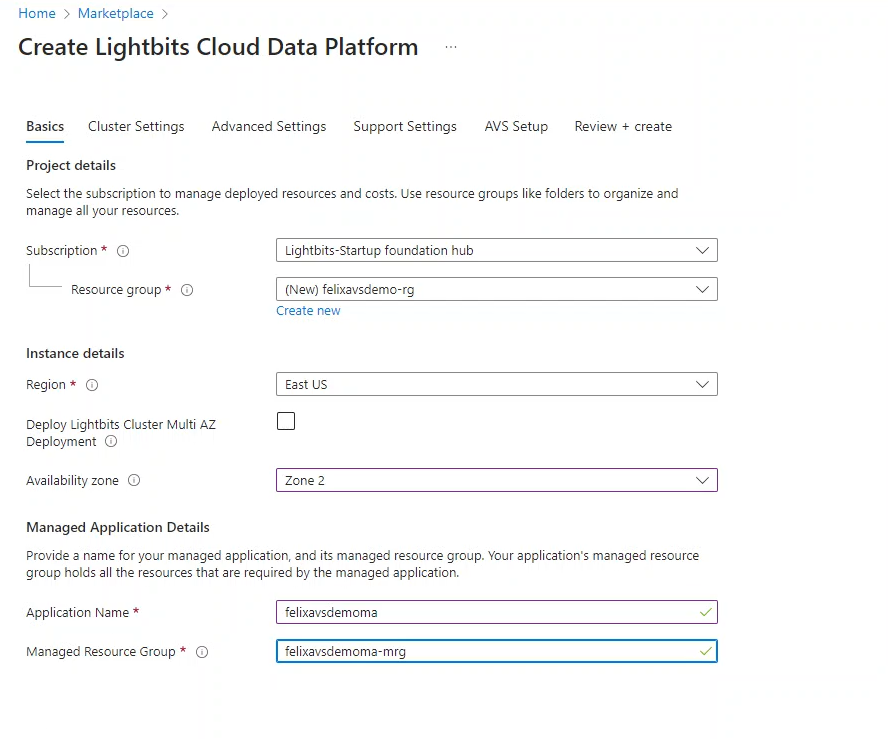
Inside the Basics tab, select:
Subscription: This does not have to be the same subscription as your AVS SDDC.
Resource Group: You can use a currently deployed resource group or create a new one.
Region: Select the same region that the SDDC is deployed into for best performance.
Multi-Az: Check this box to deploy the Lightbits cluster across all three availability zones in the region (where available).
Availability Zone: If not deploying in Multi-Az, choose the zone that is the same as the AVS SDDC. This information can be found on the Private Cloud Overview page in the Number of hosts section.
Application Name: Give the managed application a name.
Managed Resource Group: Optionally give the managed application managed resource group a unique name to fit with the organizational naming conventions.
The output should look like the screenshot below.
Click Next.
Cluster Settings Tab
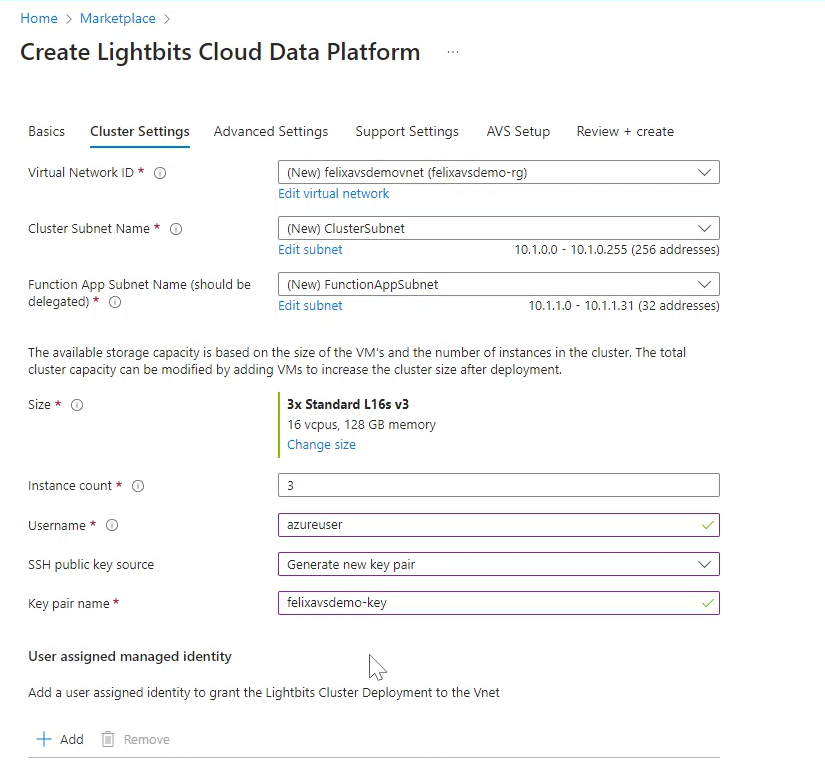
Inside the Cluster Settings tab, select:
Virtual Network ID: click Edit Network and change:
Name: The name of the new vNet.
Address Space: Ensure that the new vNet address space does not overlap with any other vNet that is connected to the AVS SDDC or the address space of the AVS SDDC. This network must have a minimum address space of /23.
Subnets: The subnets should update once the address space has been changed. If it does not, please ensure that both subnets reside in the vNet address space.
Size: Choose the size of the Virtual Machines that will be a part of the Lightbits cluster. For help with sizing, please reach out to your Lightbits representative.
Username: Choose a username that can be used to SSH into the Lightbits VMs.
SSH Public Key Source: Generate a new key pair or select an existing key. Please note that this will need to be accessible for running the LBAVS commands.
User Assigned Managed Identity: This can be left blank, since a new vNet is being created.
The output should look like the screenshot below.
Click Next.
Note that for connecting directly to an AVS SDDC using the AVS Setup tab, a new vNet must be created.
Advanced Settings
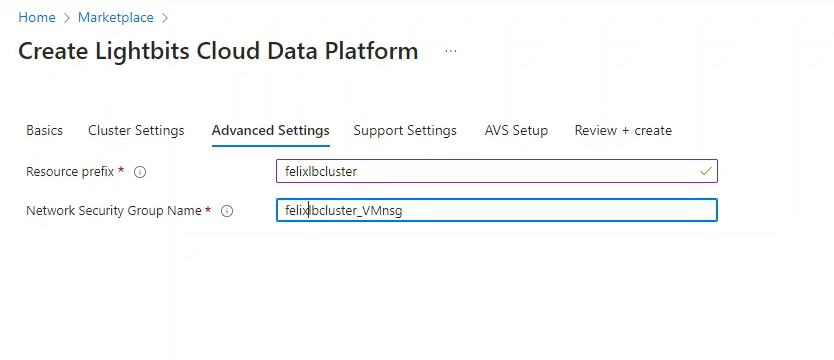
Inside the Advanced Settings tab, select:
Resource Prefix: Optionally change the prefix that will be applied to all resources deployed as part of the managed application, including the Virtual Machine Scale Set.
Network Security Group Name: Optionally change the name of the generated Network Security Group that will be assigned to the managed application Virtual Machines.
The output should look like the screenshot below.
Click Next.
Support Settings
Inside the Support Settings tab:
Check the box to allow the Lightbits Support team access to the cluster. This allows Lightbits to provide proactive support to the managed application. If this box is not checked, customers will have to provide Lightbits Support personnel with SSH access to the cluster, if required.
Customer Name: Provide the name of a point of contact in the company in case Lightbits Support needs to contact you for troubleshooting or maintenance.
Customer Email: Provide the email address of a point of contact in the company, in case Lightbits Support needs to contact you for troubleshooting or maintenance.
Customer Phone Number: Provide the phone number of a point of contact in the company, in case Lightbits Support needs to contact you for troubleshooting or maintenance.
AVS Setup
Inside the AVS Setup tab:
Check the box to create connectivity to the AVS SDDC during deployment. If this box is not checked, the express route, gateway, and connection must be made manually using the Azure documentation.
Express Route Key: Generate a new ExpressRoute authorization key and place it into this section. Note that ExpressRoute authorization keys can only be used for a single connection at any time.
Express Route Address ID: Copy the ExpressRoute ID from the ExpressRoute section of the Connectivity blade of the AVS Private Cloud page. It will be in this format: /subscriptions/$SUBSCRIPTION/resourceGroups/$RESOURCE_GROUP/providers/Microsoft.Network/expressRouteCircuits/$CIRCUIT_NAME
Gateway Subnet: Provide a /27 address space that is within the vNet created in the Cluster Settings tab, but does not overlap with the other subnet ranges.
The output should look like the screenshot below.
Click Next.

Review
Check the Co-Admin Access Permission. This allows Lightbits access to the Managed Application Managed Resource Group when required.
Check that the information entered is correct, and click Create.
Wait for the deployment to complete. If the AVS Setup section is filled in, the deployment will take around 25 minutes to complete. If the AVS Setup section has not been filled in, the deployment will take around eight minutes to complete - but you will have to follow all of the steps outlined in the Azure documentation to connect the AVS SDDC to the Lightbits vNet.