Title
Create new category
Edit page index title
Edit category
Edit link
Create and Connect a Client
Get the System JWT from Azure Portal
- Log in to the Azure portal.
- Click the managed application that you created (it should be in the resource group that was defined during the deployment).

- Click the managed resource group.
- You will see a list of all the resources created for the cluster.
- Click the Key vault.
- Go to the Access Control menu.
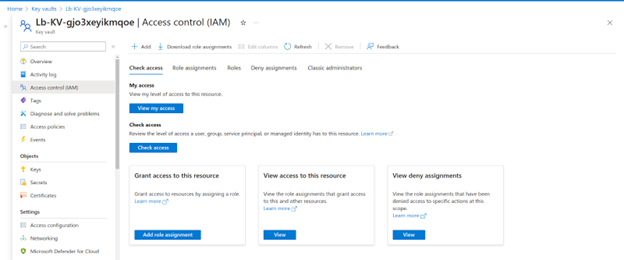
- Click Add Role Assignment.
- Select the Key Vault Secrets User role.
- Click Next.
- Click Add Member.
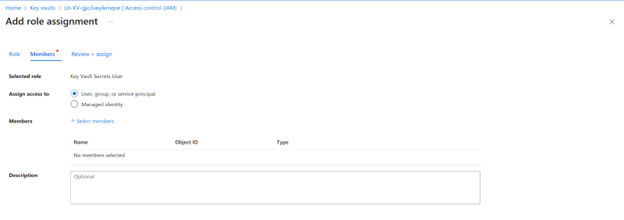
- Choose the user that will be able to read the JWT.
- Click Review and Assign.
- Go to the Secrets menu in the Key vault.
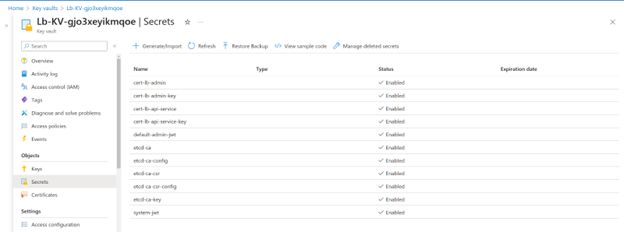
- Click the system JWT or the Admin JWT of the default Project.
- Click the current version of the secret.
- Click Show Secret.
- Copy the secret value.
For other methods of accessing the authentication JWT, visit the JWT section of the user guide.
Create a Client Virtual Machine
To connect to Lightbits volumes, you will need a VM to map the volumes to. This VM must be accessible via SSH using a direct SSH connection or a Bastion Host.
This section details how to deploy the client VM through the Azure portal. Use the checklist outlined in the Gathering Information About the Deployment Environment section for any inputs.
Users performing this action will require permissions to deploy Virtual Machines in the Azure subscription and Resource Group that is being used.
- Access the Azure portal using the common link ms.portal.azure.com, and log in using your Azure credentials.
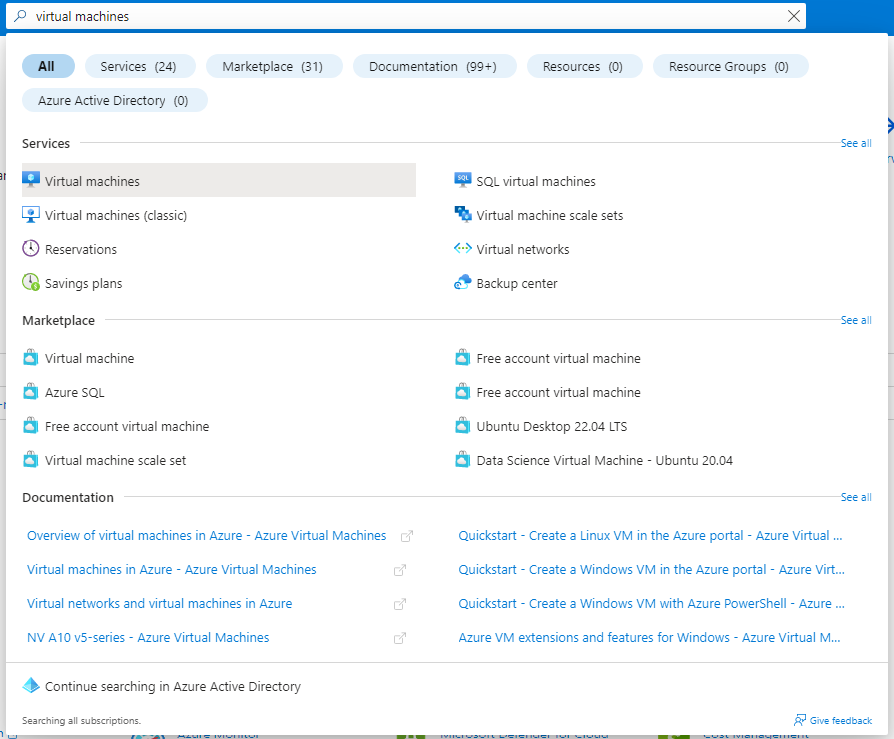
- Once in the portal, use the search bar and search for Virtual Machines, and then click on the entry.
- Inside the Virtual machines blade, click the + Create drop-down and select Azure virtual machine.
- Inside the Create a virtual machine blade, select the Subscription and Resource group that will be used for the deployment.
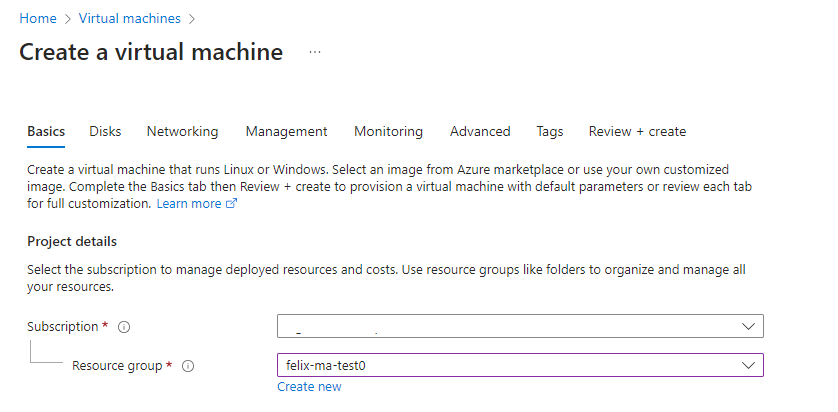
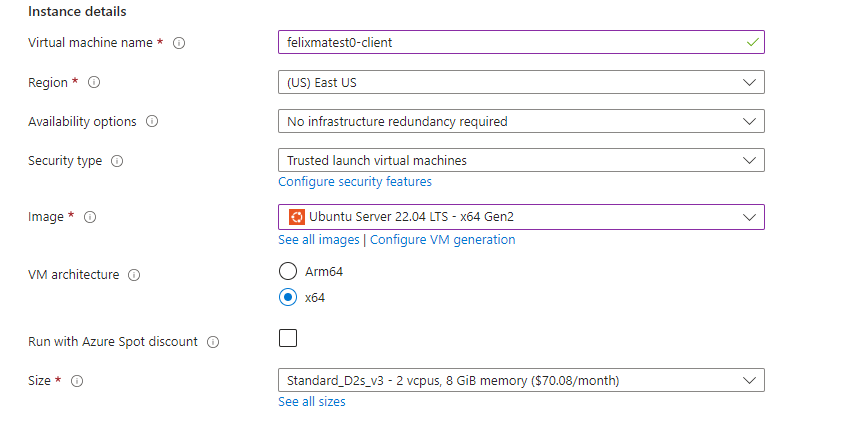
- Under Instance details, enter you Virtual machine name, Region, Image and Size. For the purposes of functional testing, we will use Ubuntu 22.04 and D2s_v3 as the selections. You can change these based on your requirements.
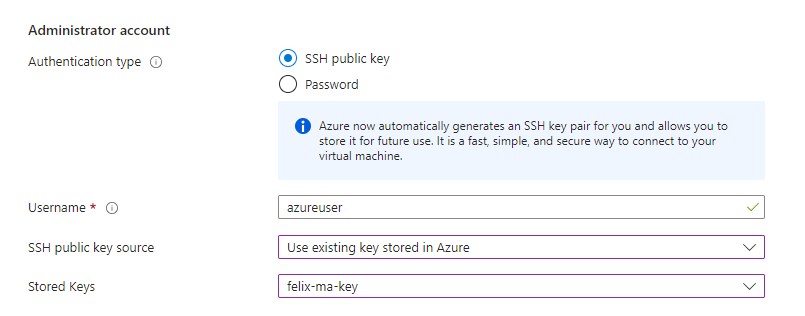
- Under Administrator account, choose your authentication method. You can choose the same authentication that you used for the Lightbits cluster.
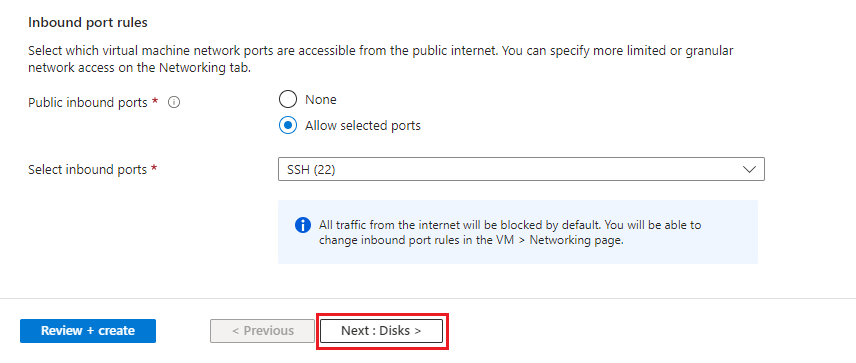
- Leave the Inbound port rules as default and click Next: Disks.
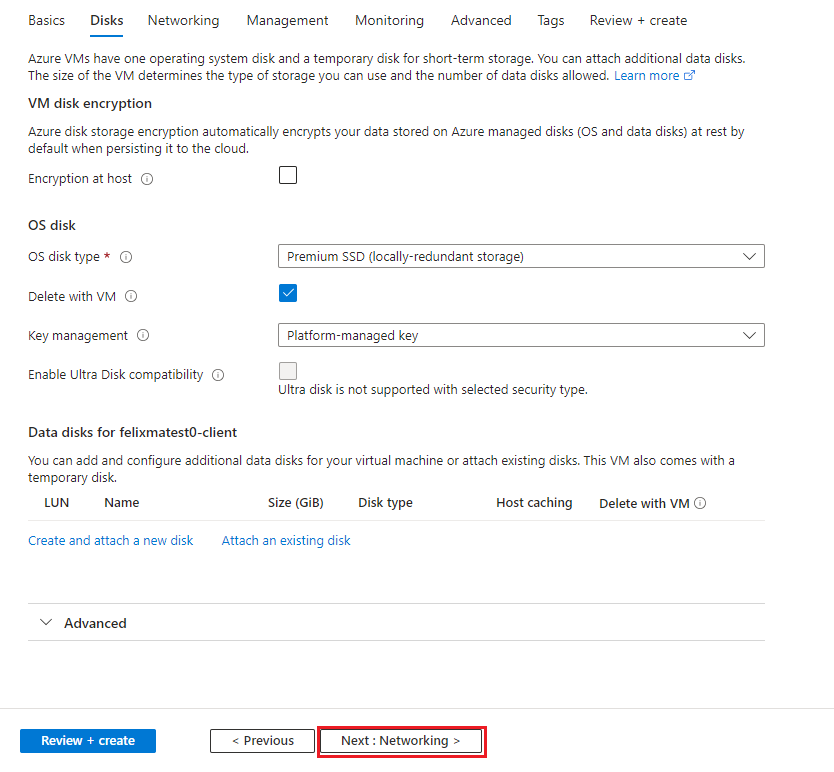
- Leave the Disks tab as default and click Next: Networking.
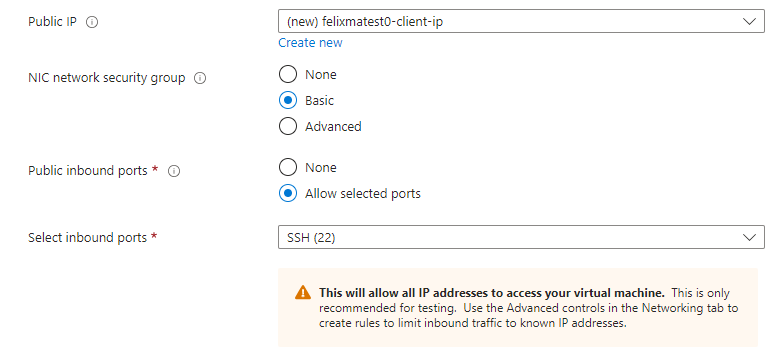
- In the Network interface section, choose the vNet and subnet that will be used.

- We will use a Public IP, so here we selected a public IP with a Basic network security group with SSH allowed. If you are using a bastion and NAT gateway, you can choose None.
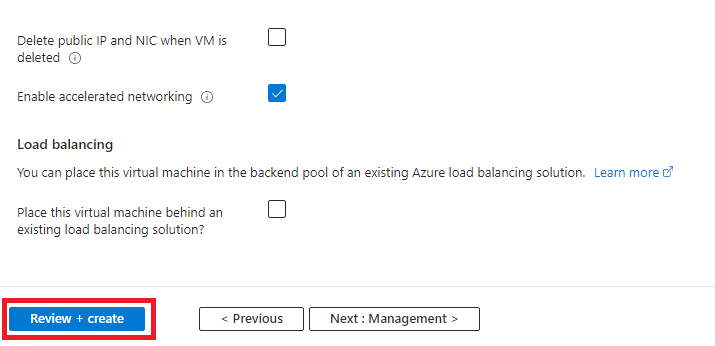
- Leave the rest as the defaults and select Review + create.
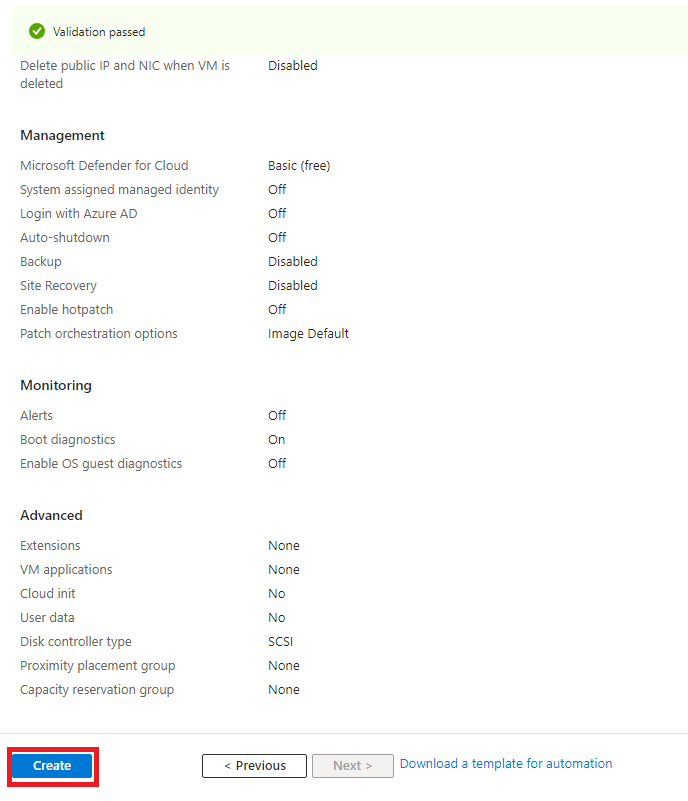
- Here you can review the information, and when validation has passed, click Create to deploy the VM.
Azure will redirect you to a Deployment blade, where you can track the progress of the deployment.
Once the blade shows that the deployment is complete, validate the deployment by clicking Go to resource.
Connect to the Client Virtual Machine
For additional information, see the Azure documentation on Connecting to a VM.
Using an SSH Client
- To SSH using an SSH client, you'll need the IP address of the virtual machine. To get the public IP address, navigate to the Azure portal and to the Virtual machines blade. Find your Virtual machine and get the public IP address.

- Use your preferred SSH tool - such as PuTTY from Windows or a terminal from Unix - to SSH into the virtual machine.
Using a Bastion Host
- To use a bastion host, navigate to the virtual machine that you want to connect to and click on the virtual machine name.

- In the virtual machine overview blade, click Connect.

- Click Bastion. If this is the first time you are using a Bastion inside the vNet, click Use Bastion.

- Follow the process to create a Bastion subnet inside your vNet and wait for Azure to create the Bastion host. This process will take a few minutes. When the process is complete, you will be able to connect to the VM through the bastion host.
Configure the Client
- SSH into the client virtual machine.
- Check if nvme_tcp driver is enabled:
sudo modinfo nvme_tcp- If the response shows an error message, run the following to install the extras package for Azure Linux:
sudo apt install -y linux-modules-extra-azuresudo modprobe nvme_tcp- Check client hostnqn:
cat /etc/nvme/hostnqn- If there is not a response or the file does not exist, install nvme-cli:
sudo apt install -y nvme-cli- Note the client's hostnqn. This will be used as the Lightbits volume "ACL" later.
Create Volume
Find Lightbits Node Virtual Machine
- Navigate to the managed application resource group and click on the virtual machine scale set (VMSS).
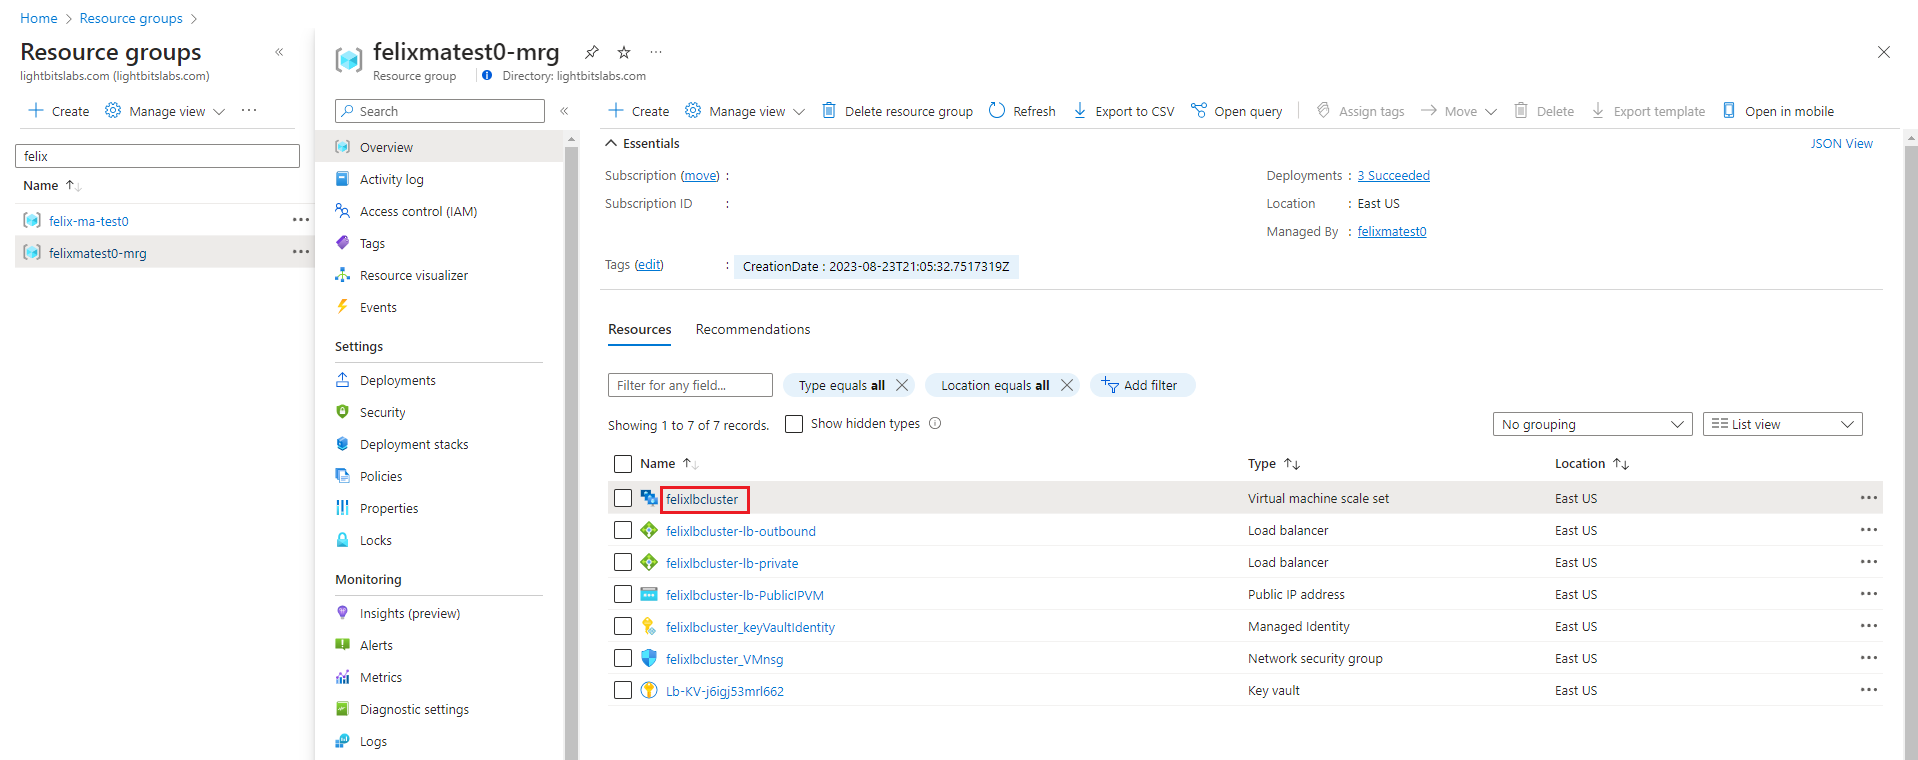
- In the VMSS blade, click Instances.

- Click the first entry to bring up the virtual machine blade.

- Here you can find the IP address of the instance too SSH from the client as a jump host or use a bastion.

Find Private Management and Discovery Address
- Navigate to the managed application resource group and click the *-lb-private Load balancer.
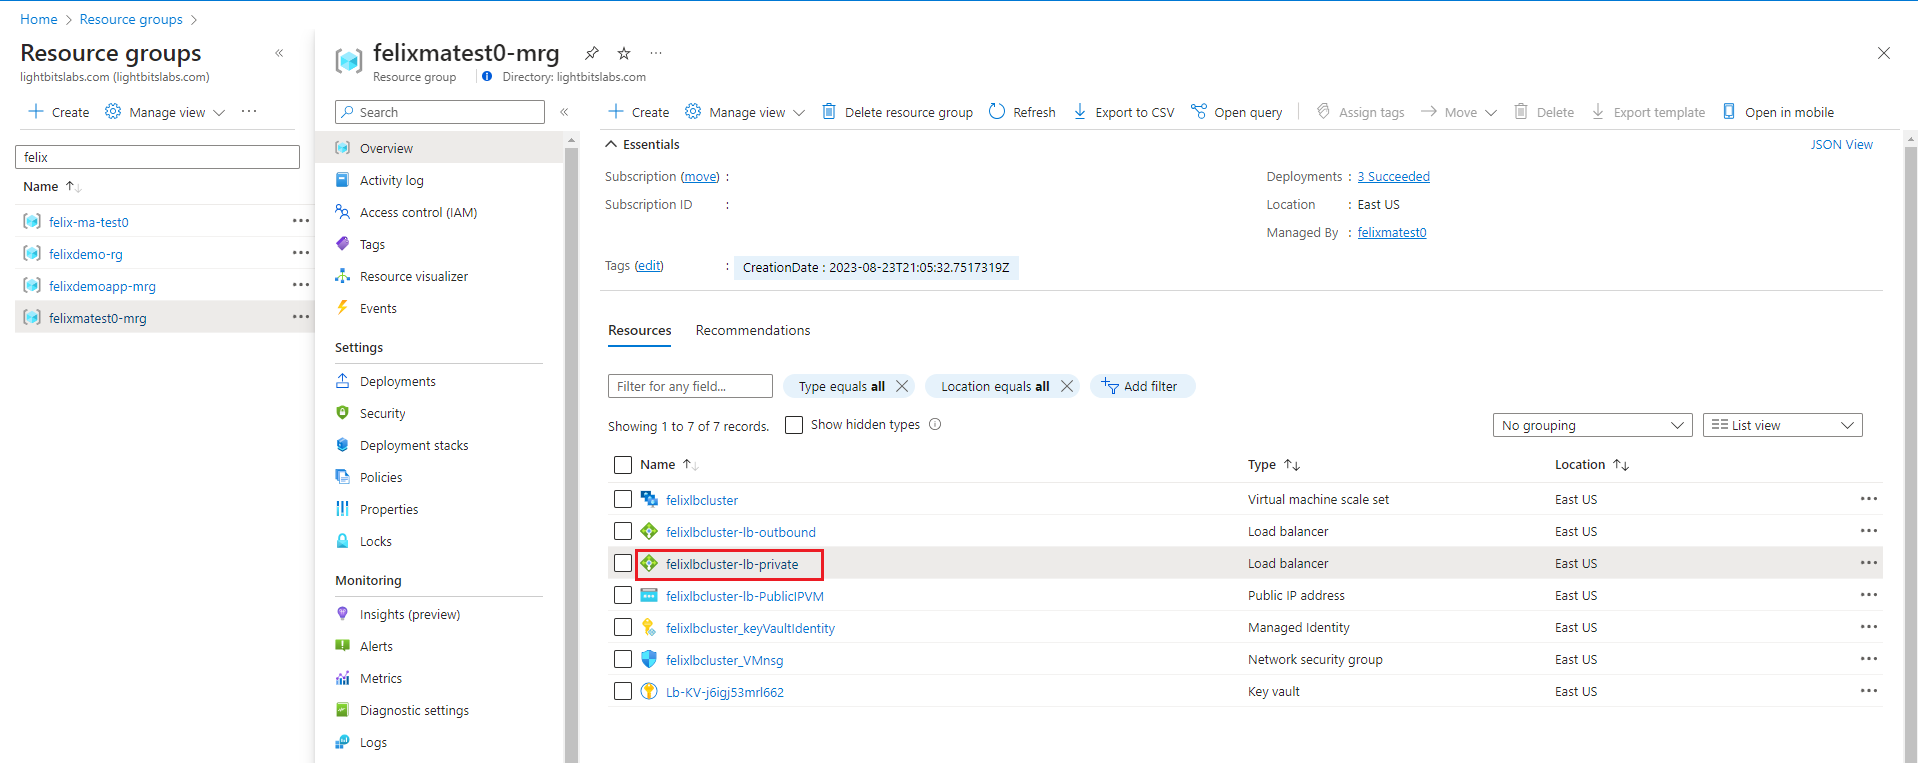
- Select Frontend IP configuration.

- The discovery and management IP for the cluster is under IP address.

Create a Volume
- SSH into a Lightbits virtual machine.
- To export the JWT as an environment variable, paste the JWT code from the Get the System JWT from Azure Portal section.
- Check that the JWT has been exported correctly by running:
echo $LIGHTOS_JWT- Create a volume:
lbcli -J $LIGHTOS_JWT create volume --project-name default --compression true --replica-count 3 --size 100GiB --acl {client_hostnqn} --name testvol0- Check that the volume is ready:
lbcli -J $LIGHTOS_JWT list volumes- Ensure that the State value is Available.
Map a Volume to the Client
- SSH to the client virtual machine.
- Run the connect command:
sudo nvme connect-all -a {lightbits_discovery_mgmt_address} -t tcp- Verify that the disk has been attached:
sudo nvme list- The output should look similar to:

- You can see the paths that the volume is using by running:
sudo nvme list-subsys {volume_path}- The output looks similar to the below example. Here, there are three copies of data and three paths, each pointing to a Lightbits node that holds a copy of the volume. The primary node is currently
172.22.0.5.

- The volume can now be given a filesystem and mapped to a directory on the client, or used in a raw block mode ready for workloads.
© 2026 Lightbits Labs™