Accessing the Lightbits Cluster
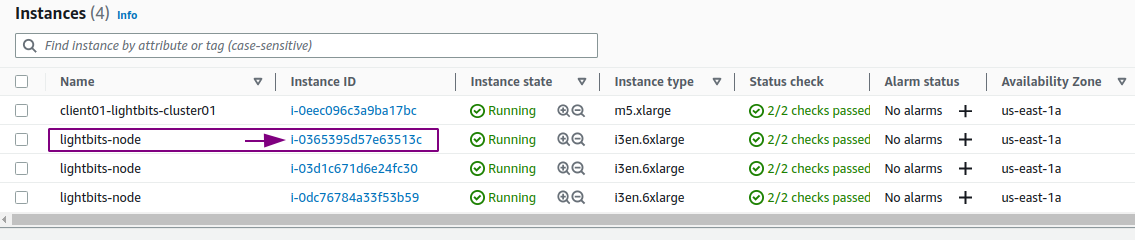
After the stack deployment has been completed, you will find the Lightbits instances in your EC2 console.
Navigate to the EC2 console within the same region where Lightbits was deployed, and check that you have three new instances running. Make sure that the three Lightbits instances in a state of Running with the “Status check” are showing 2/2 checks passed:

Accessing Lightbits using 'SSM'
By default, terminal access to Lightbits instances should be done via AWS Session Manager (SSM).
There is also an option to SSH to the cluster, with a client instance attached to the Lightbits cluster's VPC. Make sure to transfer the SSH-key to the client in same VPC; you will then be able to SSH with a client.
For more information, see Launching an Application/Benchmarking Client Inside the Lightbits Cluster VPC.
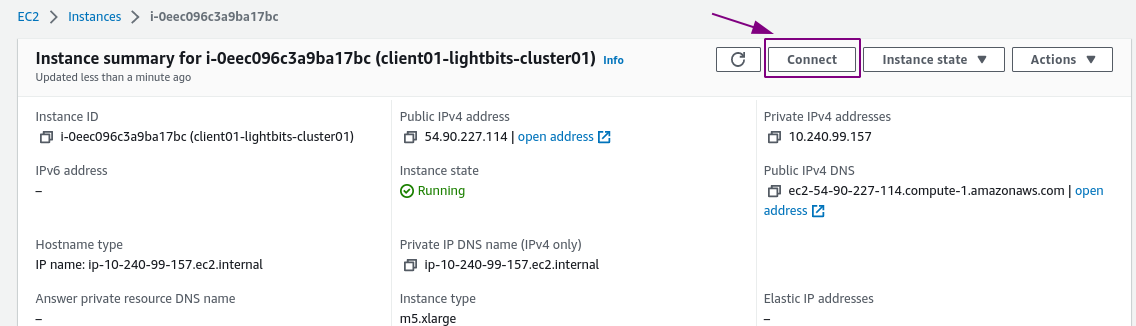
Click on one of the Instance IDs of the Lightbits nodes:
On the Instance summary page, click Connect:
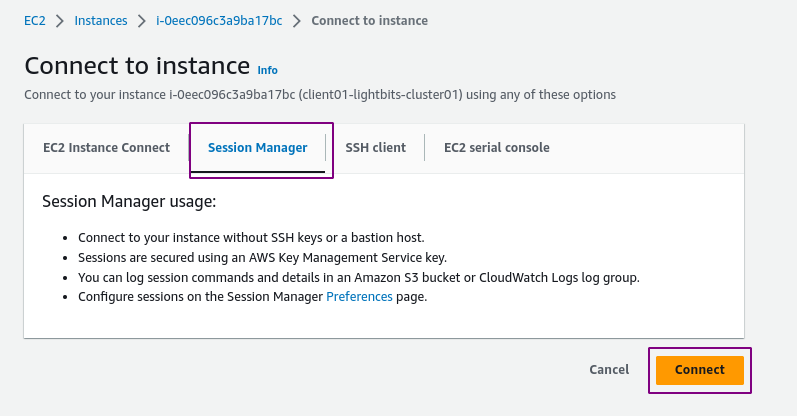
Make sure you are on the Session Manager tab and click Connect:
Lightbits Cluster Preparation
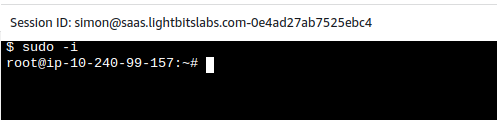
Grant Root Access:
- Once you are on one of the Lightbits nodes, you can create a Lightbits volume to provision to your clients.
- Run
sudo -iin order to grant root permissions:
System-Scope JWT
During the installation process, the system is bootstrapped with a system-scoped default project. To act as cluster-admin, you will need a JWT.
The installation process will create a JWT and should be placed at /opt/light-app/config/cluster1/system_jwt, under the system_jwt file:
xxxxxxxxxx$ cat /opt/light-app/config/cluster1/system_jwt``` **Sample Output:** ```bashexport LIGHTOS_JWT=eyJhbGciOiJS...E9FgyPMntTUKdbUp1YA53vlVPzz5_VqSwKXcrngThe easiest way to use the lbcli command-line from one of the Lightbits servers is to add the JWT to the end of the /etc/lbcli/lbcli.yaml file. This file is stored in any Lightbits server. You can use one of them to manage the server.
Example:
xxxxxxxxxxroot@rack11-server93:~ cat /etc/lbcli/lbcli.yamloutput-format: human-readabledial-timeout: 5scommand-timeout: 60sinsecure-skip-tls-verify: truedebug: falseapi-version: 2insecure-transport: falseendpoint: https://127.0.0.1:443jwt: eyJhbGciOiJS...E9FgyPMntTUKdbUp1YA53vlVPzz5_VqSwKXcrngThis JWT gives admin access to the cluster. Make sure to delete this file once it is complete or secure, and do not share the file with unauthorized users.
Creating a Volume on the Lightbits Storage Server
To create a volume on the cluster, log into any of the Lightbits cluster servers and enter the lbcli create volume command.
In this guide we will cover only the basic 'lbcli' administration commands. For the full list of lbcli commands, see the Lightbits CLI documentation and the CLI section of the Lightbits Administration Guide.
Sample Command
Create a volume with compression and three replicas, and list the created volume:
- replica-count - the number of replicas of the volume spread across the cluster nodes (three is recommended in AWS).
- compression - true/false
- project-name - multi-tenancy can be enabled, but for this guide we will use the 'default' project.
- acl - Access List - this will be passed in the client 'nvme-connect' command, in order to expose the volume to the client.
lbcli create volume --size="200 Gib" --name=1vol --acl="acl3" --compression=true --replica-count=3 --project-name=defaultSample Output
root@ip-10-240-99-251:~ lbcli create volume --size="200 Gib" --name=1vol --acl="acl3" --compression=true --replica-count=2 --project-name=defaultName UUID State Protection State NSID Size Replicas Compression ACL 1vol c074cf03-83fb-4c15-a601-5444e798f51f Creating Unknown 0 200 GiB 3 true values:"acl3"List the created volumes:

Check the cluster information and health:
xxxxxxxxxxlbcli list nvme-devicesThis retrieves a list of NVMe devices in the cluster. The list can be filtered to list NVMe SSDs that exist in a specific server, are managed by a specific node, or are unmanaged.
root@ip-10-240-99-251 ~]# lbcli list nvme-devicesName Size NUMA ID Serial State Server UUID Node UUIDnvme2n1 6.8 TiB 0 AWS22EA692497797A9BE Healthy 4938ba53-fb49-5808-a569-b82a47534438 8d6b84c2-7e5b-51a0-bc80-82dbdfea1b2bnvme1n1 6.8 TiB 0 AWS22FE0C4F81D088221 Healthy 4938ba53-fb49-5808-a569-b82a47534438 8d6b84c2-7e5b-51a0-bc80-82dbdfea1b2bnvme0n1 50 GiB 0 vol09c72f6b71d39d2fb None 4938ba53-fb49-5808-a569-b82a47534438 ---nvme2n1 6.8 TiB 0 AWS2207524D0BE56AAE3 Healthy 820fc798-503a-531f-8fe8-2d55a93d93de 70f13d2b-e9bf-5c56-86ff-81c0e8a5deccnvme1n1 6.8 TiB 0 AWS22F60AF8B3E204658 Healthy 820fc798-503a-531f-8fe8-2d55a93d93de 70f13d2b-e9bf-5c56-86ff-81c0e8a5deccnvme0n1 50 GiB 0 vol01d689741828e1641 None 820fc798-503a-531f-8fe8-2d55a93d93de ---nvme0n1 50 GiB 0 vol0facde4e1a98c3ea1 None bad13f3f-320f-5844-ad0b-504e37699c78 ---nvme1n1 6.8 TiB 0 AWS2208BC3676C95FA8F Healthy bad13f3f-320f-5844-ad0b-504e37699c78 dbf95231-b3fe-5a92-be7b-a94bfc7e2615nvme2n1 6.8 TiB 0 AWS2263A6122C9ED092A Healthy bad13f3f-320f-5844-ad0b-504e37699c78 dbf95231-b3fe-5a92-be7b-a94bfc7e2615xxxxxxxxxxlbcli list nodesReturns a list of nodes in the cluster, and information on each node.
root@ip-10-240-99-251 ~]# lbcli list nodesName UUID State NVMe endpoint Failure domains Local rebuild progressip-10-240-99-242.ec2.internal-0 70f13d2b-e9bf-5c56-86ff-81c0e8a5decc Active 10.240.99.242:4420 [i-03d1c671d6e24fc30 ip-1...] Noneip-10-240-99-251.ec2.internal-0 8d6b84c2-7e5b-51a0-bc80-82dbdfea1b2b Active 10.240.99.251:4420 [i-0365395d57e63513c ip-1...] Noneip-10-240-99-179.ec2.internal-0 dbf95231-b3fe-5a92-be7b-a94bfc7e2615 Active 10.240.99.179:4420 [i-0dc76784a33f53b59 ip-1...] None