Search
The following are instructions for how to install Lightbits Operator on OpenShift version 4.19.
You will first need to create a new project for the CSI, using #oc new-project <project-name>.
- Install the operator using the OpenShift Web Console.
- Create the cluster and csidriver CRs in your own selected OpenShift project.
The following steps detail how to install the Lightbits CSI using the Red Hat OperatorHub.
- Use the OpenShift Web Console to install the Lightbits Operator. Select the OperatorHub and search for Lightbits and follow the on-screen instructions.
- Click Lightbits Operator.

- Click Install.
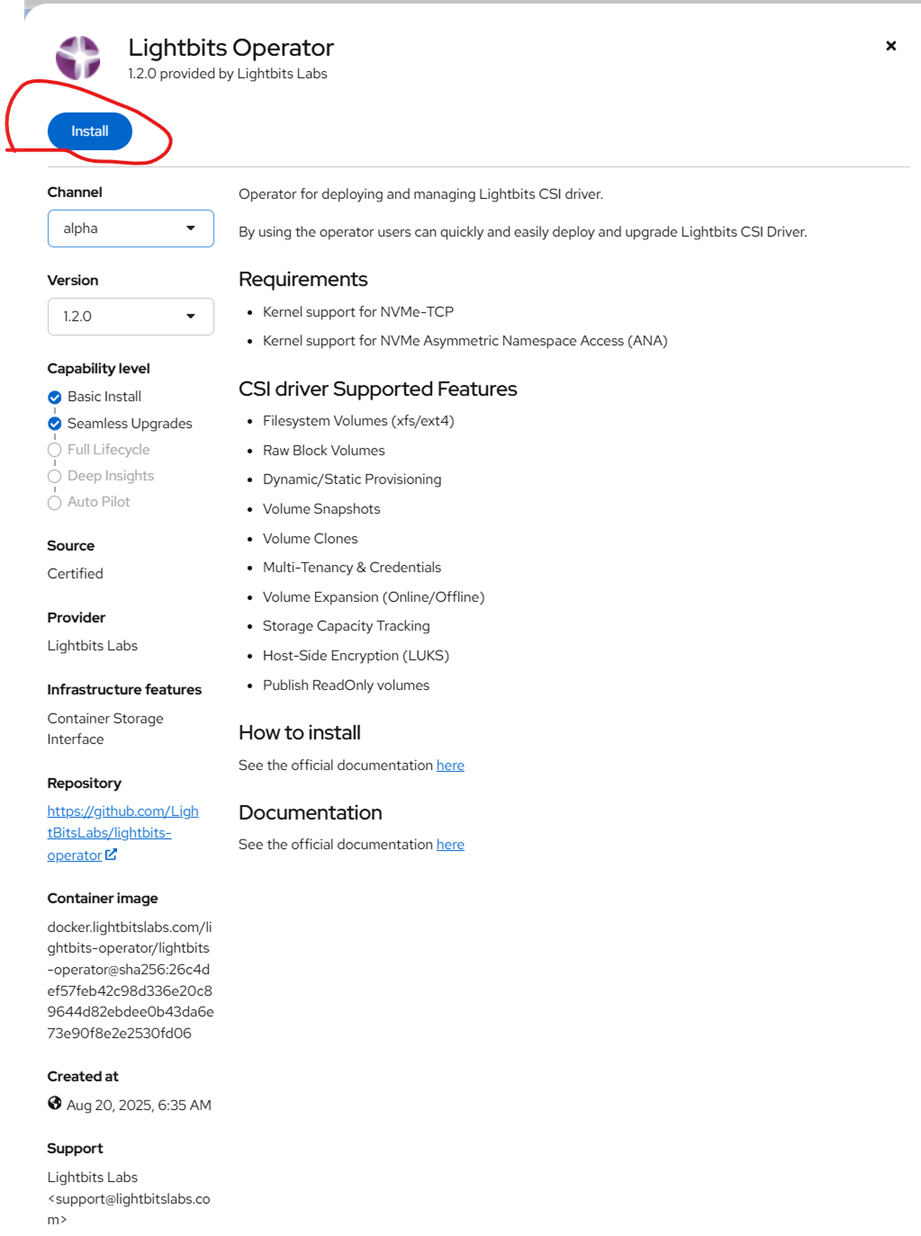
- Click Install.

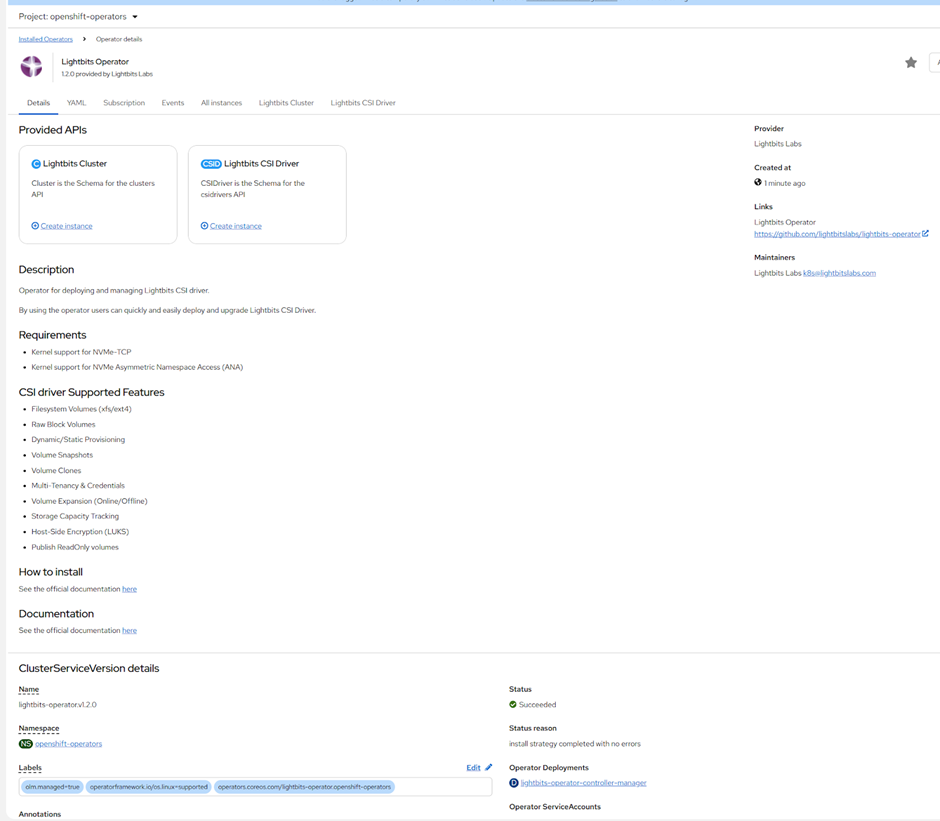
- Click View Operator if you want to inspect it.

- Create a secret yaml file for the Lightbits cluster. Below is a sample of a secret file. Make sure to change the
<name>and<namespace>, and add the base64 format Lightbits JWT token.
# Source: lb-csi-workload-examples/charts/storageclass/templates/secret.yamlapiVersion: v1kind: Secretmetadata: name: lb-secret namespace: lightbits labels: helm.sh/chart: "storageclass-0.1.0" app.kubernetes.io/instance: "release-name" app.kubernetes.io/version: "" app.kubernetes.io/managed-by: "Helm"type: Opaquedata: jwt: |- ZXlKaGJHY2lPaUpTVXpJMU5pSXNJbXRwWkNJNkluTjVjM1JsYlRweWIyOTBJaXdpZEhsd0lqb2lTbGRVSW4wLmV5SnBjM01pT2lJdllXNXphV0pzWlM5c2FXZG9kRzl6TFdObGNuUnBabWxqWVhSbGN5OWpaWEowTFd4aUxXRmtiV2x1TFd0bGVTNXdaVzBpTENKeWIyeGxjeUk2V3lKemVYTjBaVzA2WTJ4MWMzUmxjaTFoWkcxcGJpSmRMQ0poZFdRaU9pSk1hV2RvZEU5VElpd2ljM1ZpSWpvaWJHbG5hSFJ2Y3kxamJHbGxiblFpTENKcFlYUWlPakUzTlRjek5UZ3hNeklzSW1WNGNDSTZNVGM0T0RnNU5ERXpNbjAuVzViYWlYZWR3Z3BfcGFDc3hWa1N1VDQtOXFvMEk1VThaMHZncnoxTGw0OWhlYkZmbTFQUHA4S2pXNDRaVEFST2Vqa1N1TF9aSlJ3elc2bERTYlFLX0tYeDNOMmhHQnQ0ODk5TmEzNGJrRE5LTy1POEdlN1lrNHE1VEt4dExURVhhc1JhUlc1YUdRbGhtMTViQnBuSTRzOXp6ZjhhU3pDdndodGJJWFNSZVM0WXRXZDAyWklHcTd3bmVfd1ZnX2FPQkxBcVdiVk1WR0JhTDJQb0pNZmlya0hiZmNMazdvdzdtNUc1SDdqczhjVFVaRkZDWERlYXNMSjZLeHU3Mk1aa25iSDVOajNwSlBjUFVpbXVxdmVaempFRUxvTnpfcmVwX3NIWlFrckNicmxEUE5TNXBPZkpLVG01d3JIbjNJZHRYYWFvX0ItbEVBTlVQaENmeE5qYlZR- Deploy the secret file and verify:
# oc apply -f <secret>.yaml
# oc get secret -n <namespace>
- Create a Lightbits Cluster Custom Resource (CR) and install it. Below is an example of the CR. Make sure to change the IP addresses and other relevant fields.
xxxxxxxxxxapiVersion: storage.lightbitslabs.com/v1alpha1kind: Clustermetadata: name: lightbits-cluster namespace: lightbitsspec: clusterName: jpmc-lightbits projectName: default clusterAdminSecretName: lb-secret addresses: - ip: x.x.x.x port: 443 scheme: grpcs - ip: y.y.y.y port: 443 scheme: grpcs - ip: z.z.z.z port: 443 scheme: grpcs# oc apply -f <lightbits-cluster.yaml>
- Create a Lightbits CSI Driver CR and install it. Below is a sample of the CSI driver CR.
xxxxxxxxxx# lightbits-csidriver.yamlapiVersion: storage.lightbitslabs.com/v1alpha1kind: CSIDrivermetadata: name: lightbits-csi namespace: lightbitsspec: clusterRef: name: lightbits-cluster namespace: lightbits controller: {} node: {}# oc apply -f <lightbits-csidriver.yaml>
- Verify to ensure that the
statefulsetanddaemonsetare running.
# oc -n <project> get sts,ds,pods
- Create a storage class and install it. Below is an example of a storage class. Make sure to change the values to reflect your cluster.
xxxxxxxxxx# Source: lb-csi-workload-examples/charts/storageclass/templates/storageclass.yamlapiVersion: storage.k8s.io/v1kind: StorageClassmetadata: name: lb-scprovisioner: csi.lightbitslabs.comallowVolumeExpansion: trueparameters: mgmt-endpoint: x.x.x.x:443 replica-count: "1" compression: disabled project-name: default mgmt-scheme: grpcs csi.storage.k8s.io/fstype: ext4 csi.storage.k8s.io/controller-publish-secret-name: lb-secret csi.storage.k8s.io/controller-publish-secret-namespace: lightbits csi.storage.k8s.io/controller-expand-secret-name: lb-secret csi.storage.k8s.io/controller-expand-secret-namespace: lightbits csi.storage.k8s.io/node-publish-secret-name: lb-secret csi.storage.k8s.io/node-publish-secret-namespace: lightbits csi.storage.k8s.io/node-stage-secret-name: lb-secret csi.storage.k8s.io/node-stage-secret-namespace: lightbits csi.storage.k8s.io/provisioner-secret-name: lb-secret csi.storage.k8s.io/provisioner-secret-namespace: lightbits# oc apply -f <lightbits-sc.yaml>
- Verify:
# oc -n <namespace> get sts,ds,pods
- This completes the procedure. You can now create the pods and pvc to test it.
Was this page helpful?