Overview
This article contains instructions for deploying Photon, the graphical user interface designed to manage multiple Lightbits clusters.
There are two ways to install Photon:
- Using the provided OVA VM to deploy on a VMWare vCenter.
- Using the provided Qcow2 VM to deploy Qemu-KVM.
After successfully installing Photon, refer to the sections at the end of this document to understand the system's limitations and explore some of the suggested scenarios.
Hardware Prerequisites
- CPU: At least 2 CPUs, 2 GHz or faster
- Memory: 8 GB RAM minimum
- Disk Space: 40 GB minimum
- Network: The Photon instance requires network access to the Lightbits Cluster API.
Option 1: VMWare Deployment
- Download the Photon OVF file by running the following command:
curl -1sLf 'https://dl.lightbitslabs.com/YOUR_CLOUDSMITH_TOKEN/lb-photon/raw/versions/1.2.0-rc0/ubuntu-24.04-photon.ova?accept_eula=1' -o ubuntu-24.04-photon.ovaReplace YOUR_CLOUDSMITH_TOKEN with the private token you received from Lightbits for artifact downloads (provided in the Addendum).
- Open your vSphere or vCenter client.
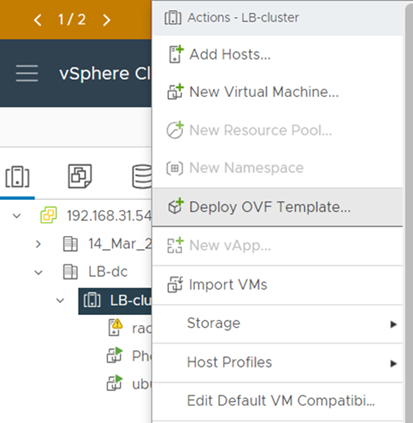
- Open the Options menu from an available vCenter host, and add a new VM by selecting the Deploy OVF Template option, as illustrated in the image below.
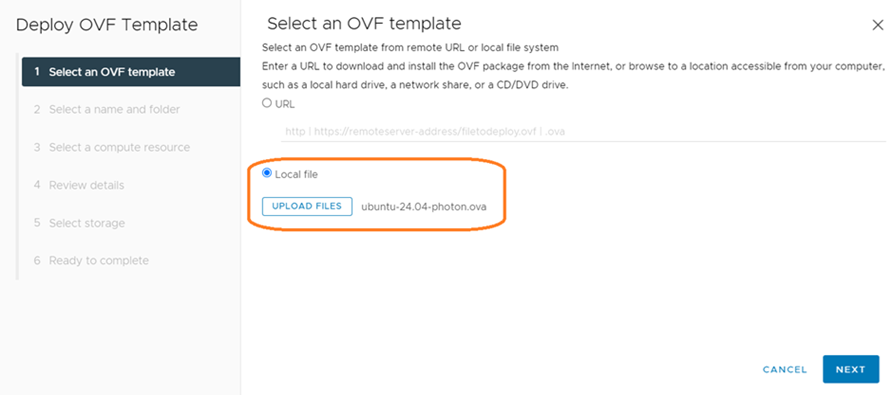
- It is recommended to first download the OVF file locally, and then point to the local location in the first step of the Deployment wizard.
- Complete the wizard’s steps by providing a name for the VM, selecting a host server, configuring the network (both DHCP and Static IP options should work), and setting any other desired configuration changes such as server name, SSH keys, etc.
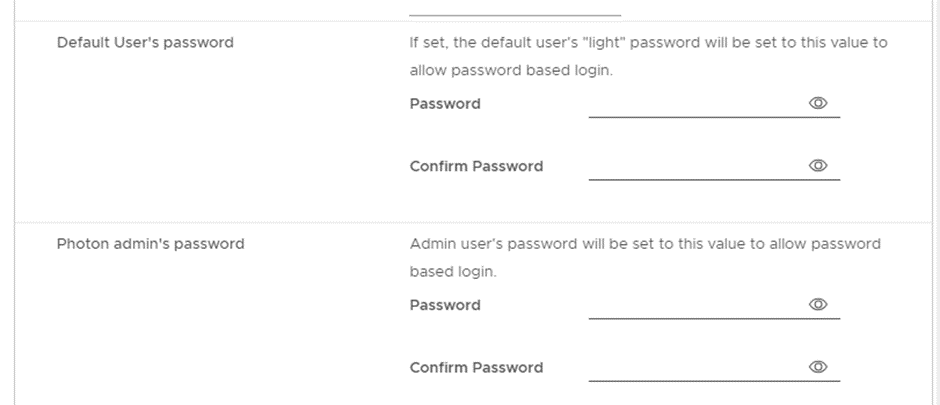
- Be sure to enter the username and password for both the internal user running the Photon services and the user accessing Photon’s web interface.
- Review the deployment summary, confirm the deployment, and wait for the deployment operation to complete.
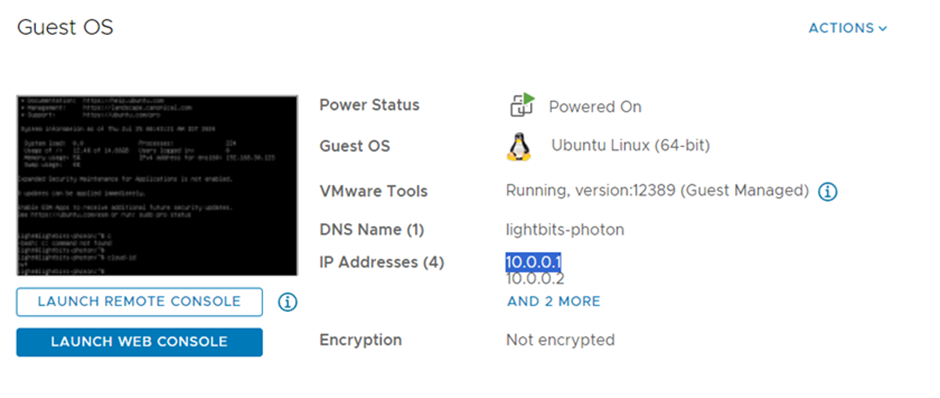
- Once the deployment is complete, copy the Photon’s VM-assigned IP and continue with the Initial Login and Cluster Attachment section later in this article.
Option 2: Qemu-KVM
The following sections explain how to set up and run a Photon VM using the basic provided configurations. For advanced configurations, refer to the Advanced sections below.
- Set up Qemu/KVM. Follow one of these guides for additional information: Ubuntu / AlmaLinux.
- Install apache2-utils to generate the admin’s user password.
- From this directory, run the following command to download the tarball:
curl -1sLf 'https://dl.lightbitslabs.com/YOUR_CLOUDSMITH_TOKEN/lb-photon/raw/versions/1.2.0-rc0/ubuntu-24.04-photon.tar.gz?accept_eula=1' -o ubuntu-24.04-photon.tar.gzReplace YOUR_CLOUDSMITH_TOKEN with the private token you received from Lightbits for the artifact downloads (provided in the Addendum).
- Untar the downloaded file.
xxxxxxxxxxtar -xzvf ubuntu-24.04-photon.tar.gzubuntu-24.04-photon/ubuntu-24.04-photon.qcow2ubuntu-24.04-photon/lightbits-photon-appliances.shubuntu-24.04-photon/README.md- Change the directory to the inflated folder:
xxxxxxxxxxcd ubuntu-24.04-photon- Run the following command to create cidata.iso, which will contain customization data. Follow the instructions in the script to customize the image. There are two options: simple and advanced.
Simple will allow you to:
- Change the Linux default user's password.
- Set the Photon admin user's password.
Be sure to enter the username and password for both the internal user running the Photon services and the user accessing Photon’s web interface.
Advanced (in addition to the simple configuration) will also allow you to:
- Configure the static IP for the VM.
xxxxxxxxxx./lightbits-photon-appliances.sh cidataThis command walks you through a deployment wizard, asking several questions and eventually creating the following files:
xxxxxxxxxxubuntu-24.04-photon/meta-dataubuntu-24.04-photon/user-dataubuntu-24.04-photon/network-configubuntu-24.04-photon/cidata.iso- You can now issue the following command to create the VM:
xxxxxxxxxx./lightbits-photon-appliances.sh runYou should see output showing the VM that is running and the IP you can access.
Initial Login and Cluster Attachment
- Use the provided VM IP, and in Chrome, paste the copied IP to the address bar (as shown below). For example: https://[your-photon-vm-ip]. Note that assigned IPs might be different for your deployment.

Use the username and password provided during the deployment stages.
- After a successful login, click the Add Cluster button to attach a new non-production Lightbits cluster:
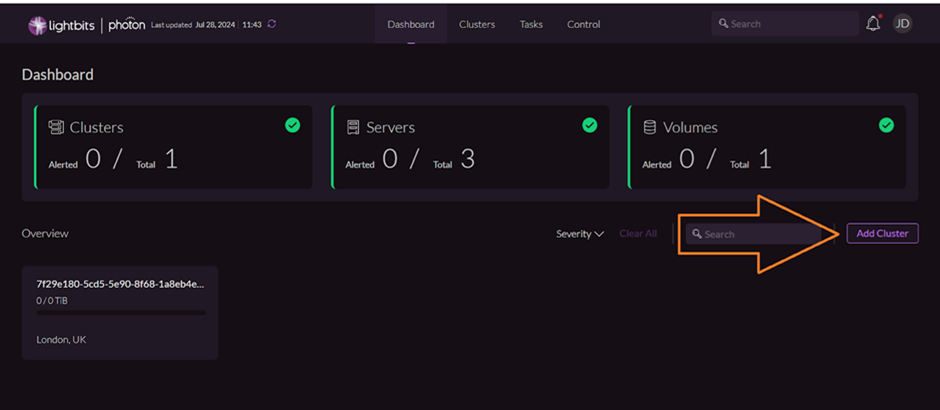
- In the dialog that pops up after clicking on the Add Cluster button, select the Add Existing option and follow the instructions listed in the UI to connect to the cluster. Make sure to specify the complete Lightbits cluster API endpoint: IP and port (443) of one of the Lightbits servers API endpoints.
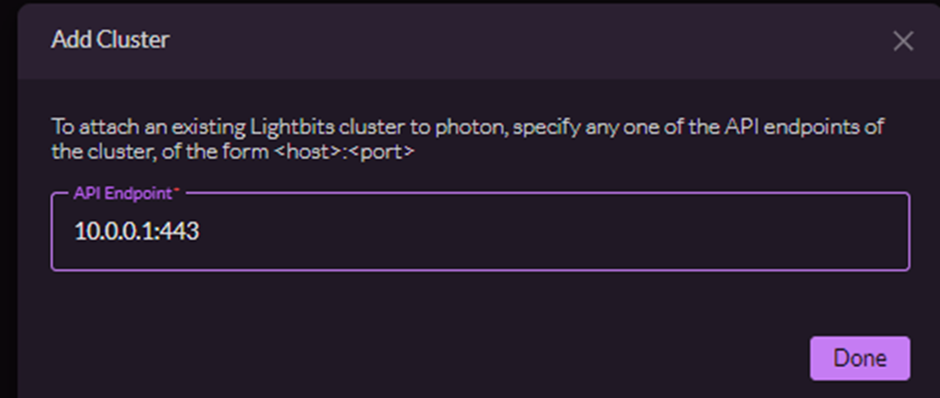
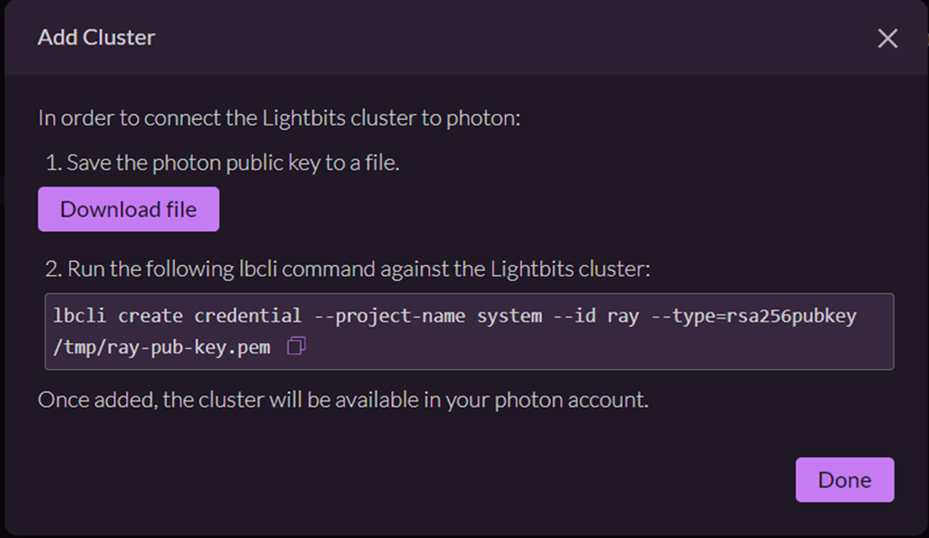
- Follow the instructions to complete the process of attaching a Lightbits cluster to Photon.
Operational Functionalities and System Limitations
- Charts and metrics in the upper sections of the UI will be supported in future versions.
- Lightbits cluster upgrade functionality is not supported.
- User management (operations such as adding, removing, or configuring roles) is not supported.
- This version has been tested and is supported on Chrome. While other browsers might function, they are not officially supported at this time.
- This version is optimized for handling up to 128 managed volumes. Performance might be impacted with a higher volume count. Support for larger volumes sets will be introduced in future versions.
Suggested Use Cases and Usage Scenarios
You can use Photon to operate the following use cases.
Storage Provisioning and Management
- Create volumes (with or without using a snapshot).
- Create snapshots out of existing volumes.
- Delete volumes and snapshots.
Monitoring
- Use the main screen of Photon to track the health and status of your cluster(s).
- Use the Clusters page to review volume usage and overall capacity.
- Use the different panes in the Clusters page to view volumes, servers, and snapshots.
- Use the volumes, servers, and snapshots filter capabilities.
- Add, remove, and change the order of the provided table columns.
You are encouraged to explore Photon’s various pages, views, and components as well.