
The Lightbits Installer is a terminal wizard that deploys a Lightbits storage cluster onto your servers. It collects your license, cluster layout, and hardware choices, and then configures each node and brings the cluster up for you.
The following video and documentation detail how to work with the Installer using Lightbits' Text-Based User Interface (TUI).
Installing and Launching the Wizard
The wizard runs entirely in your terminal. You can use the arrow keys to move between fields, Enter to confirm a screen, and Esc/Ctrl+C to quit at any time.
Using the Wizard
The following video and text detail the wizard screens, step-by-step.
1. Welcome - Choose Remote (install onto other machines over SSH) or Local (install on this machine — requires root or sudo access on the local machine).
2. License Key - Paste your Lightbits license key.
3. Release Track - Pick LTS (Long-Term Support — recommended for longer support windows) or STS (Short-Term Support — latest features, shorter support window).
4. Lightbits Version - Pick the version to install from the chosen track.
5. Deployment Type (Remote only) - Choose Single Server or Cluster. For a cluster, enter the number of nodes (3–16). Note that before this step, a System Requirements Check screen also appears automatically for local installs.
6. SSH Authentication (Remote only) - Provide the SSH username and either a password or a key, plus a sudo password if needed.
7. Remote Target Nodes (Remote only) - Enter the IP address or hostname of each node.
8. Cleanup Check - The installer scans each node for leftovers from a previous install and asks you to confirm before continuing.
9. Proxy Configuration (only if a proxy is required) - Enter proxy URL(s) per node.
10. Network Interfaces - Pick the management and data network interface on each node.
11. Storage Selection - The installer scans available drives; you choose which to use for data, and optionally a separate journal drive.
12. Cluster Name - Give the cluster a name.
13. Final Review - Review every answer, edit anything if needed, then confirm to start the deployment.
14. Deploy - Watch live progress as the installer configures every node.
A successful installation should look something like this:
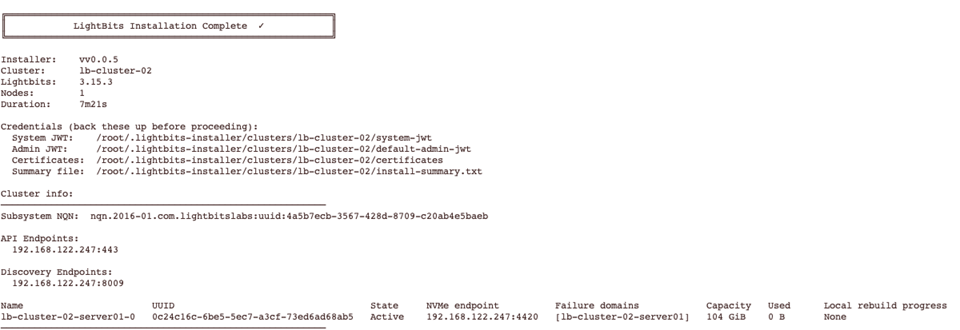
Lightbits collects logs from the installation and from the Bill of Material from the storage nodes. The system JWT is included in the lbcli.yaml file for easy access to the cluster.
Deployment Failure
The Deploy screen shows which phase failed, the failed task(s), and the path to a full log file. Most failures (SSH connectivity, missing packages, disk state) are best fixed by correcting the wizard inputs and re-running the installer. Cleanup is handled automatically on the next attempt.
If you need to inspect or hand-edit the generated Ansible files directly:
Inventory and playbooks:
Generated inventory:
(plus host_vars/ and group_vars/all.yml in the same directory)
Deploy log:
All commands below must be run from the light-app working directory:
TLS/certificates setup (if not yet done):
Main deployment:
Node cleanup (before retrying on a partially-installed node):
These use the same inventory and playbooks that the wizard generated, so any manual edits you make to the hosts file or group_vars/all.yml will take effect on the next run.